
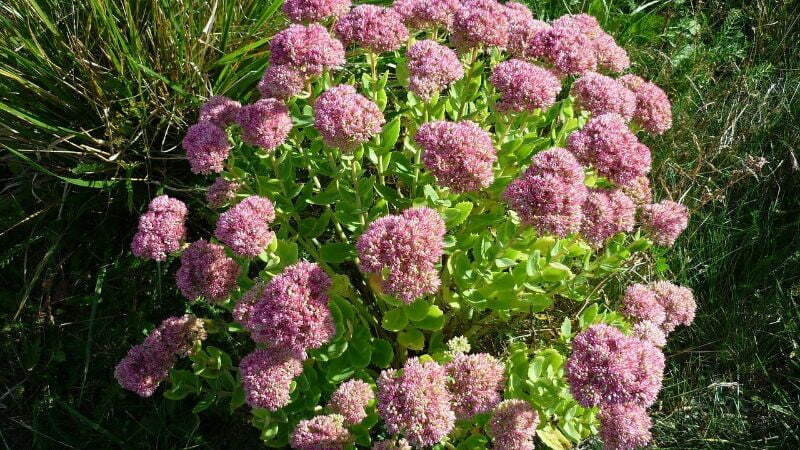
Sedums are one of the easiest plants to propagate, and other stonecrops can be propagated in the same way. You only need a leaf or a sliver of stalk. A new succulent can be grown quickly by planting a stonecrop stem shallowly in a very gritty medium or by placing a leaf on the surface of sandy soil. In just a few weeks, the plant material will root and produce a new stonecrop.
Will sedum cuttings root in water?
Sedum “Autumn Joy” is easy to root from stem or leaf cuttings. This can be done whenever the plants are actively developing. Place stem and leaf cuttings in water or a plastic bag with a damp paper towel to protect them from drying out before planting. To take the cuttings, use sharp scissors or pruners.
Can you propagate sedum from cuttings?
Another easy approach to propagate sedums is to cut the stems off existing plants. Dig around an existing plant’s base and sever a few new stems from each plant. The stem cuttings can be replanted directly in the garden or in a seed tray with damp sand.
Can you divide stonecrop sedum?
You should know how to divide sedum so you can spread more of these attractive plants, whether you have little spreading rosettes or towering Autumn Joy stonecrop. Sedums thrive in hot, dry climates and bring lively color and quirky form to difficult-to-plant regions. Sedum separation is a simple project that will quickly increase the number of easy-to-grow plants. New divisions form quickly and require little more attention.
Late fall to early spring is the best time to divide perennial perennials. When you know when to divide sedum, you can ensure that it recovers quickly and roots well. Because many sedum plants die back in colder climates, determining where the plant is until new growth appears in early spring can be difficult. It is best to separate the plants at this time.
Plant division can increase blooms and improve plant health. Every three to four years, sedum should be divided. Some growers advise dividing the plant after it has blossomed and while it is still developing. Although recovery will be longer, these resilient small succulents should be able to bounce back rather quickly.
Cuttings
Use a sterilized, sharp knife or pair of scissors to cultivate “White Stonecrop” from cuttings. Remove a stem from the main plant and callous it for a few days before planting it in well-draining soil. When the earth has totally dried out, water it.
Leaves
Occasionally, “White Stonecrop” will shed leaves, which might take root where they land. If you’re going to propagate a leaf, let it dry out for a few days so the end calluses over, then place it in well-draining soil. When the earth is entirely dry, water it.
Seeds
Sow your seeds in a soil that drains well. If you live in a zone above 9a, you can plant Sedum seeds outside. You can start sowing indoors under a grow light or on a seed mat if you live in a cooler climate.
How do you propagate Russian stonecrop?
Every two to three years, divide your plant to reproduce it. This is a simple procedure that should be completed in the spring or early summer. The larger divisions can be planted immediately into their permanent locations, while the smaller ones can be grown in a cold frame.
Is it better to propagate in water or soil?
Propagation does not always succeed the first time, but we encourage you to start someplace because it is gratifying when it does! You’ve got it.
Many plants are best grown in potting soil, although some can also be propagated in water. This is due to the fact that they have developed in an environment that permits them to do so. Most Aroid plants, including pothos, philodendrons, monsteras, and ZZ plants, may be propagated in water. Because these plants descended from an ancestor that lived in marshes, the ability to adjust to flooding while still growing was critical to their survival. As a result, that ancestor’s descendants are able to grow in water as well. They are still terrestrial plants, though, and will flourish best if planted in soil over time. In no time, you’ll be putting the ‘pro’ in propagation if you follow our simple methods below.
Look for a little brown root node just below the leaf or stem/vine intersection on a mature vine. Pothos propagation relies on these small bumps. Cut a couple inches of healthy stem just before a node and include a node or two with the cutting, as here is where the new roots will emerge.
Remove any leaves that are too close to the node, particularly those that may become immersed in water when you place your cutting into your glass vessel.
Place your plant cuttings in a glass jar and place it in a bright to moderate indirect light source. Place in bright, direct light or in extremely low light. (Find out more about a plant’s light requirements here.)
The most difficult step, arguably: patience! On a weekly basis, check root growth from the node. When necessary, replace the water with new, tepid water. Replace the water every few days or simply top off the vessel with fresh water when it appears to be running lowas long as there is no murkiness or fungal forming. If the water is muddy, we recommend replenishing it to ensure the root system’s health.
We recommend waiting until the root is at least 1 inch long or longer before transplanting your plant cuttings from the glass vessel into a planter using potting mix. This should take 4-6 weeks to complete. Saturate the potting mix with room temperature water and place the cutting in bright indirect light once the roots have been potted. Between waterings, allow the potting mix to dry out. Here’s where you can learn more about potting plants.
It is entirely possible to keep your plant cuttings growing in water indefinitely. A word of caution: the longer your plant cutting lies in water, the worse it will likely get. Why? Because water is devoid of nutrients, it can raise the risk of fungal diseases. During the spring and summer growing seasons, you can assist combat this by changing the water and adding a small amount of fertilizer every month or so.
How long does it take for sedum cuttings to root?
This method of propagation has the ability to produce hundreds of new Sedum plants, as each leaf on your existing plant has the potential to become a new plant. Snip only healthy leaves from your Sedum and insert the stalk into potting soil to reproduce it using leaf cuttings. After around 2 to 3 weeks, the leaves should be fully rooted, with new plantlets growing at the base.
Seed Propagation
Given the simplicity and speed with which Sedums may be propagated from cuttings, waiting for the seeds to germinate is a labor of love. Seed propagation also has the disadvantage that some hybrid cultivars do not grow true to seed. Although a tip, stem, or leaf cutting is an exact clone of the original plant, the seed contains genetic material from two plants, resulting in unpredictable results. Place the seeds in damp sand and gently push them down to propagate Sedums from seed. Keep the seeds between 80 and 95 degrees Fahrenheit (27 and 35 degrees Celsius).
Does sedum spread quickly?
A creeping sedum might be the plant for you if you’re seeking for a lovely plant that thrives in almost complete neglect. Sedums strut their stuff in places where few other plants would dare. They thrive in crevices in a garden wall or pathway, on roofs or the tops of gently sloped birdhouses, and even under big trees where their massive roots capture the majority of the soil’s moisture. They work well in rock gardens, borders, and containers as well.
Many gardeners have begun to look more closely at species of the genus Sedum as seasonal and long-term droughts become more common across the United States. Sedum ‘Autumn Joy’ is well-known for its late russet blooms, but its ground-hugging relatives are gaining popularity as well.
Stonecrops, sometimes known as creeping sedums, provide a constant source of interest in my garden. They’re some of the most adaptable, drought-tolerant, and simple-to-grow perennials I’ve ever grown in my decades as a gardener. Sedums really reduce the amount of work a gardener has to do as they grow in size. Low growers are known for their ability to spread quickly, preventing weeds from gaining root. Although it is not required to deadhead spent blooms because they will fade away on their own, aged blossoms can be easily removed with a string trimmer. They are rarely afflicted by illnesses or pests as long as they are not over-watered.
While sedums may thrive in even the poorest soilin fact, low or little soil is their preferred mediumgood drainage is essential for their growth. Too much wetness, especially standing water, will destroy a sedum faster than any drought can.
Sedums, once established, require almost no further water to thrive, even in the driest conditions. Sedums are a great choice for gardens in hot, arid areas like the western United States, but they can grow almost anyplace with sufficient drainage. They can be found sticking up from boulders or sprouting from just a few inches of scree in frigid, alpine regions. Almost every USDA Hardiness Zone has at least one Sedum species. Although most creeping sedums prefer full sun, they can also thrive in moderate shade. Sedum ternatum, a North American native, is a sedum that prefers a little more moisture and shade than its relatives.