
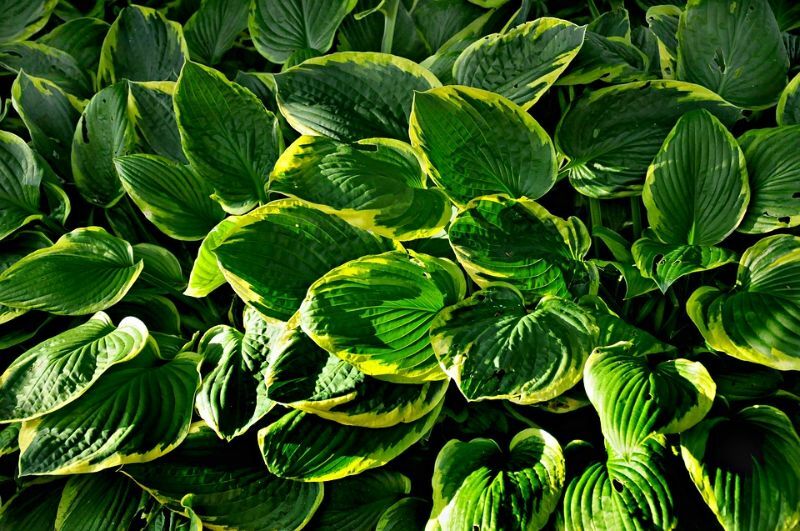
Dig little clumps that have formed beside the bigger parent clump if you only need a few divisions. Insert a spade into the soil outside the dripline of leaves if you want to divide huge hosta plants into many viable clumps. Cut a circle in the earth around the entire plant with a sharp spade.
How do you transplant a giant hosta?
Dig all around the hosta clump and pull it out of the ground using a garden shovel or fork. Move your hosta to its new location after removing as much of the old dirt as possible without injuring the roots. Hosta clumps can be quite heavy! Now is the moment to divide your plants if you’ve been thinking about it.
You’ll need a wheelbarrow or a tarp to transport the cluster to its new location. Keep the roots moist and sheltered, especially if you won’t be able to transfer right away. Hosta plants rely on their roots quickly adapting to their changing surroundings.
Set the clump a little deeper in its new location than it was in the old. Fill in around it with enriched soil, mounding the dirt around the clump to a bit more than the depth it was before. The clump will rest at its original depth when the soil settles over time. Keep the clump well hydrated for the next six to eight weeks, and keep an eye on it for signs of wilt caused by a lack of moisture in the weeks after that. Due to the trauma of transplanting hostas, the first season may offer lesser leaves, but the next year will see your plant happy and healthy once more.
When can I move hostas?
Is there anything better than a hosta? …and, of course, two hostas! It couldn’t be simpler to divide your hostas. We are frequently asked by concerned hosta enthusiasts how and when to divide their plants so that they do not suffer damage. When done correctly and at the right time, dividing your hostas keeps them healthy and vigorous.
The process for splitting your hostas is the same whether they are in pots or in the ground. Remove the plant from the pot or dig it out of the ground and shake off as much soil as possible from the roots. After you’ve removed some soil, you’ll be able to see what you’re cutting or plucking more clearly, lowering the risk of injuring the plant. Depending on the size and density of the clump, you can divide it using a shovel, knife, or your hands. Wherever possible, I prefer to split with my hands.
Cut through the clump at a central spot, avoiding as many buds or stems as possible. You can just ease the plant apart if you’re dividing with your hands. If you accidentally break any buds or stems, don’t panic; the plant will not be harmed. Remove any damaged leaves and soak the divisions for 5-10 minutes in a pail of water before planting or potting up. To avoid transferring any viral or fungal disease between plants, disinfect any tools, surfaces, and your hands between plants.
Many individuals are unsure when the optimum time is to divide their hostas. The explanation is that there are two seasons in which division is most effective: spring and autumn. Dividing hostas in the spring should be done as soon as the first buds form, as this will help you to see where the division should be made. Your hostas will have plenty of time to root and put on new growth the following year if you divide them in the spring.
Many people prefer to divide in the early autumn because it usually means that once you’ve planted your new divisions, you won’t need to water them much.
We divide all year at the nursery, but we try to accomplish as much as we can in the fall. It’s fine to divide in the summer as long as the divisions are well hydrated. Plants divided in the winter do not produce new growth right immediately, and the ground is generally frozen, so it is preferable to wait until the spring if at all feasible.
Hostas can be divided twice or three times a year depending on the variety; slower growing kinds will take longer to recover, while strong varieties can be divided twice or three times a year. Always consider how long it took your treasured hosta to grow to its current size before chopping it up into hundreds of small pieces.
You can divide the plant by removing just one or two buds, cutting it in half, or cutting it into hundreds of pieces. The more the sum divided, the better the chances of survival.
It is possible to divide any hosta with more than two eyes (buds/stems). This does not imply, however, that the division will always be successful. The larger the division, the better its chances of survival. Smaller or slower-growing kinds should be divided with care, although fast-growing varieties can be chopped into pieces and still thrive.
Do hostas like sun or shade?
A. Hostas are low-maintenance plants with a wide variety of types to pick from. Even though they are shade-tolerant, most of them will not survive in deep shadow. When given some sun, such as early sun with afternoon shade, many hostas become more strong and show their best colors. The sun is less bright in the morning than it is in the early afternoon. It will most likely be OK in the late afternoon sun.
Where is the best place to plant hostas?
Choose a location that receives partial to full shade when planting hostas. Hostas can survive morning sun but prefer to be in the shade. It’s crucial to understand that these perennials thrive in lush, organically rich soil. Hostas should not be planted in heavy clay soil since the drainage will be inadequate. Place hostas where snow tends to pile up in places that get a lot of snow in the winter to preserve stems and leaves.
Should hostas be divided?
It’s ideal to split hostas in the spring or early fall. Divide hostas as soon as the spring or fall rains arrive, if possible. Hostas suffer the most when they lose their roots, therefore dig as much of the rootball as possible while transplanting them.
What is the best time to divide hostas?
Hello, everyone! This is Scott from Spring Hill Nurseries, and we’re talking about dividing hostas today on step-by-step gardening. Hostas, as you may know, are one of the greatest perennials for a shady garden. Because Hostas grow quickly, it’s important to divide them regularly to maintain them healthy. They grow from spring to fall, so early spring or late fall are the best times to divide. Exactly like today! Making ensuring you have the correct instrument is the first step in separating your hostas. Instead of a pointed spade, you’ll need a decent flat bottom shovel. The roots of your hostas might be damaged by a sharp spade. So it’s pretty simple while you’re digging your hole. Simply dig a hole three to five inches from the base of the plant all the way around it. Let’s have a look at what we’ve got. So there you have it, my hosta. We’ll extend around three to five inches beyond the base. We’ll go all the way around so we can get that plant out all at once. Let’s get to work on that hosta. So, now that I’ve dug out the plant, let’s get it out of here. Okay, have a look at this plant; it’s quite attractive. This is going to be fantastic and simple to divide. You can divide in a handful of different ways. You might use a large knife, such as a bread knife, or a saw. You could even be able to use your hands. I find that using the shovel is the most convenient option. Let’s split it up now. So, just move your foliage here a little bit so you can see the plant’s center, and then put your shovel in there, okay? Let’s see what we’ve got after a nice chop. Okay, this is going to work out perfectly. Come in and take a good look at this. Each of these is known as an eye root, and each of these eye roots could be a separate plant, resulting in a large number of new hosta plants. If you’re only dividing it to keep it healthy, like we did today, one split exactly in the middle would enough. All that’s left is for you to grow another hosta plant. Let’s go pick a suitable location. So, it’s finally time to plant the hosta. This is the most straightforward phase. All you have to do is dig a hole twice as large as the root mass. Mine is already dug. You’ll want to put around two tablespoons of plant food per square foot in the hole, okay? That should be mixed along with your healthy soil-compost mix. Simply place the plant in the hole and backfill it with dirt. After that, all you have to do is give it a good sip of water, sprinkle a little mulch around the planting place, and you’re done! That is all there is to it. So, splitting hostas is simple and beneficial to the plant. Simply dig it up, split it in half, and plant it. I’m Scott, and I’m here to help you with Spring Hill Nursery’s step-by-step gardening. Thank you for coming along with me.
Can hostas get too big?
Hostas are low-maintenance plants that thrive in a range of conditions, though they prefer dappled shade. It takes them around eight years to fully mature. When they develop, though, they can quickly take up a lot of room in your landscape.
They will also require maintenance every 3-4 years after that. They may also begin to die off in the middle, only putting up shoots around the edges. This indicates that the hosta is excessively large and should be divided.
Hostas are not only resilient where they are planted, but they may also be divided. They must be dispersed and multiplied in new regions at some point, or they will become too large and no longer receive the nutrients they require to survive. Alternatively, you might divide your hostas and gift some to a buddy!
Will hostas regrow if cut back?
Many hosta cultivars, for example, offer attractive fall color. During early fall cleanup, they are frequently trimmed back. I try to prune back day lilies in late summer or early fall, well before a killing frost, because they tend to appear ragged at that time. After being chopped back, they frequently sprout new growth.