
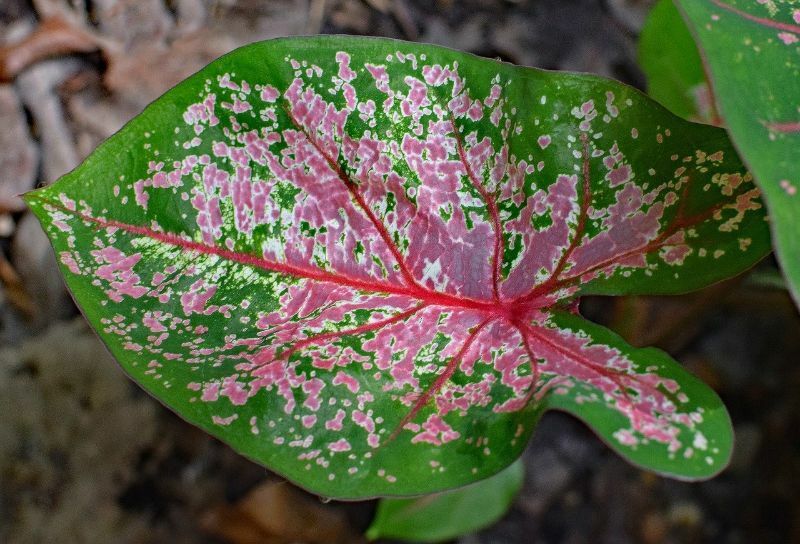
If the pot is too tiny when you buy it, repot the plant so that it can grow properly.
After that, repot your caladium in a slightly larger container every 2 or 3 years, preferably in the spring.
To improve drainage, add a layer of gravel or clay pebbles to the bottom of the pot. This will allow water to flow more freely.
Caladium requires soil mix when it is kept inside because it is the only source of nutrients.
What kind of soil do caladiums need?
Caladiums, like other plants, thrive in fertile, well-drained soil. By adding compost or top soil at planting time, you can improve the texture and fertility of your soil. Caladiums will benefit from a dosage of liquid fertilizer every now and then during the growing season.
Can you transplant caladiums?
You have three options: pull them up and discard them, leave the tubers in the ground, or dig them up, store the tubers, and replant them next year. These tubers are worth conserving since they can be used to develop caladiums the following year, whether they are left in the ground or saved and replanted.
Planting Caladium tubers
Caladium can be found growing on limestone outcrops in tropical rain forests, where it receives plenty of humidity and frequent rain. However, the porous earth there will never contain any standing water. These are the kinds of considerations you should make when planting tubers.
This doesn’t require a large pot. A recommended pot size is 5 times the diameter of the tuber. The addition of 1/3 volume of perlite to most bagged soils would suffice. Perlite is used to make the soil lighter and more porous while yet providing adequate water to the roots. Don’t forget to include a drainage layer and drainage holes at the bottom of the pot.
Take a good look at your tuber. On one side, you’ll notice a large “eye” that looks like tree rings; this is the up side; the main shoot will grow from the eye. Pot the eye up if you want tall petioles with large leaves; however, if you plant it on the side, you’ll get a more dense appearance with shorter and smaller, but more numerous leaves.
Plant the tuber shallowly with just enough dirt to cover it, water it, and keep it warm. It will take a few weeks to a few months to start growing.
Watering Caladium and winter storage
When the first shoot appears and has grown a couple of centimeters, increase the watering (about 1in). Never allow the soil to become entirely dry at this time. Just make sure it’s not submerged in water.
Caladiums require a lot of dampness. So daily showers from a spray bottle will suffice, but don’t leave any large water drops on the foliage.
Caladiums are plants that become dormant for part of the year. The leaves will begin to fade at the end of the growth season. When all of the foliage has faded and your plant has entered the winter dormancy, you will need to minimize watering until it is completely stopped.
It should be kept in its pot at a temperature of no less than 16°C (60°F). It will require a two-month relaxation period. After that, remove the tuber, change the soil, and replant it in a larger pot if the tuber has grown significantly.
Fertilizing Caladium
If you want good size tubers to develop for the next season, you must feed your Caladium during active growing. A well-balanced fertilizer with an NPK of around 8-8-8 would suffice.
Once a month, apply the soluble fertilizer straight to the soil (as directed on the label) without spraying or spilling it on the foliage. Caladium leaves are extremely sensitive to fertilizer and are easily burned.
Long-release granules with a similar NPK can also be strewn. During the growth season, use roughly 1/2 tbsp three times.
Right light conditions for Caladium
Caladiums planted outside may have a difficult time getting light. If the leaves are exposed to too much direct sunlight, they will be burned or their lovely pink hue may fade. If there isn’t enough light, the colors may not be as vibrant as you would want.
If you’re growing your Caladiums indoors, an east or west facing window is ideal. They only require a few hours of sunlight in the morning or evening to exhibit their full splendor.
Caladium propagation
Obtaining tubers is the simplest method for a home grower. They’re usually accessible from late fall through early spring, when Caladium is dormant. There are numerous benefits, including a reasonable pricing, ease of shipping, and a plant that is true to type.
The last one is something you won’t get via seed propagation. Seeds containing hybrids will be snatched, resulting in hues that differ from the parents. It will usually revert to its original, basic form, but in rare situations, you may receive a new and exciting kind.
How do you make caladiums grow bigger?
The tubers can be found in nurseries and garden centers, as well as on a number of websites dedicated to the plant. Tubers are available in four different sizes:
Each tuber contains a bigger center bud surrounded by two or more secondary buds, regardless of size. Here’s the part that makes rookie growers squirm: Before planting your elegant leaf caladium bulbs, snip away the huge central bud with a sharp knife. This will promote the development of secondary buds, resulting in a fuller yet equally vibrant plant.
Fancy leaf caladiums are heavy feeders and require loose, slightly acidic soil for good root growth. To meet the first two criteria, dig in lots of peat or pine bark before planting, and provide a good dosage of 10-10-10 fertilizer (1 tbsp/plant). Every four weeks after that, apply a 5-10-10 or comparable high potash and potassium fertilizer till fall. Depending on size, space your tubers 2 to 8 inches (5-20 cm) apart.
The tubers of a fancy leaf caladium require warm soil, at 70 degrees F (21 degrees C). The bulbs will perish if the soil is too chilly. As a result, many growers choose to start their tubers inside in peat moss or light potting soil in small pots or flats. Cover the tuber with about 2 inches (5 cm) of soil, rough side up.
Leaves will take three to six weeks to appear, so be patient. As long as the outdoor soil is warm, the bulbs can be transplanted outside at any time after that.
During the season, water thoroughly and make sure the ground does not grow too hard and dry. When the soil feels dry to the touch, water it thoroughly.
Fancy leaf caladiums are ideal for sections of your yard that are extremely shaded, and their vibrant colors and broad leaves complement ferns and hostas. If you have to put them in direct sunlight, make sure it’s the kind that comes early in the morning. They’ll repay you with a colorful tropical treat if you keep them well hydrated and fertilized.
How often should you water caladiums?
Moisture and feeding are the most critical aspects of caladium care. Fertilizer will help the plants grow stronger so that they can produce enough tubers for the following growing season.
Caladiums require constant watering, especially during periods of drought. Watering them on a weekly basis is actually suggested. Container-grown caladiums should be examined every day and watered as needed. Mulch around caladium plants, especially in pots, will aid to conserve and maintain moisture.
Caladiums must be dug up in the fall and preserved indoors throughout the winter in cold locations because they are considered sensitive perennials. Caladiums can be carefully plucked from the ground once their foliage turns yellow and begins to fall apart. Place the plants in a warm, dry place for at least two weeks to allow them to dry out. After that, remove the foliage and place the tubers in a netted bag or box with dry peat moss on top. Put the tubers away in a cold, dry place. You may transplant outside once spring arrives. Caladiums can be overwintered inside if they are grown in containers.
You may add these lovely plants to your landscape now that you know how to plant caladiums. Caladium bulb planting is simple, and with good caladium maintenance, they can last for years.
Why is my caladium bending?
When there isn’t enough water or it’s too chilly, caladium leaves bend and droop. Ensure that the Caladium plants are not exposed to temperatures below 60 degrees Fahrenheit is one of the issues to address.
If you had caladiums outside, bring them inside as soon as the temps begin to drop.
The second step is to make sure the plant is getting enough water, as mentioned previously. The plant is already stressed by the time you notice drooping leaves.
Wind is another factor to consider while planting Caladiums outside. To avoid wind damage, make sure they’re planted in a sheltered area.
When the plants are exposed to the wind, the fragile leaves and stems might be damaged as they are blown around.
Can you grow caladium from cuttings?
Because the tuber is so important to the plant’s growth, it normally does not do well when grown from a cutting.
Taking a cutting is the process of removing a portion of a plant’s stem. You must effectively take a bit of the tuber and then cultivate it to create a Caladium.
By’splitting’ the smaller pieces from the larger one, this can be accomplished. Except for the section that was linked to the main tuber, these will be nearly complete.
You have the option of leaving the little tubers whole or cutting them into smaller pieces. Every item must have an eye or a point of growth.
Although a Caladium cannot be grown from a cutting, a leaf can be submerged in water and grow roots.
This is the only way to go. It is more likely to grow efficiently if a portion of the tuber is linked to the base of the leaf.